No-Bake Vegan Bounty Tart Recipe
This post may contain affiliate links.
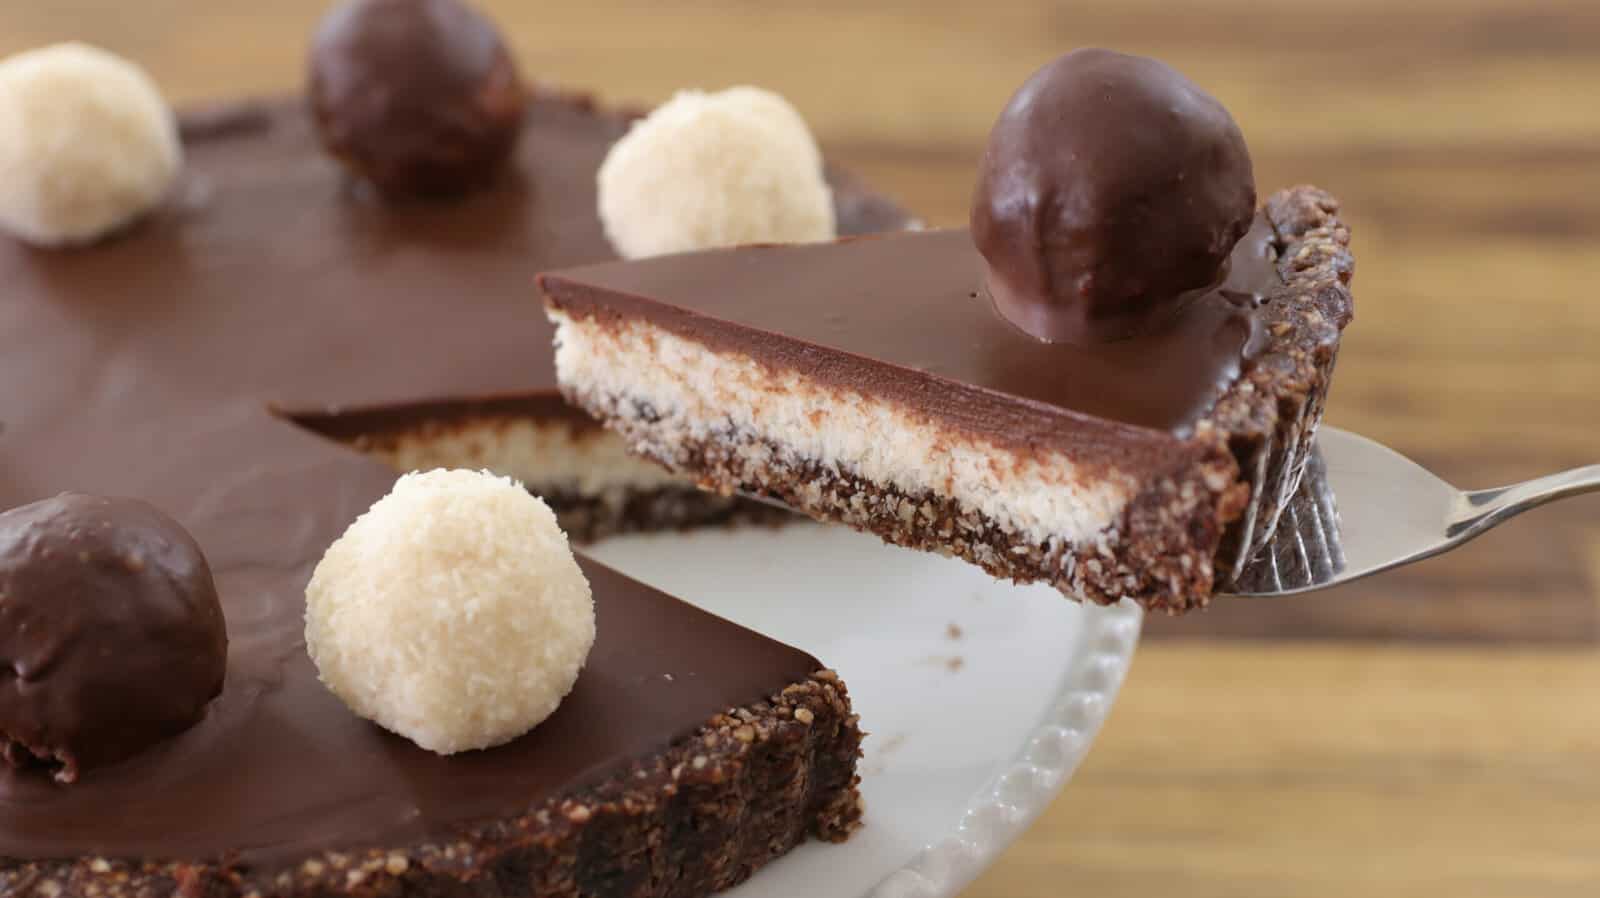
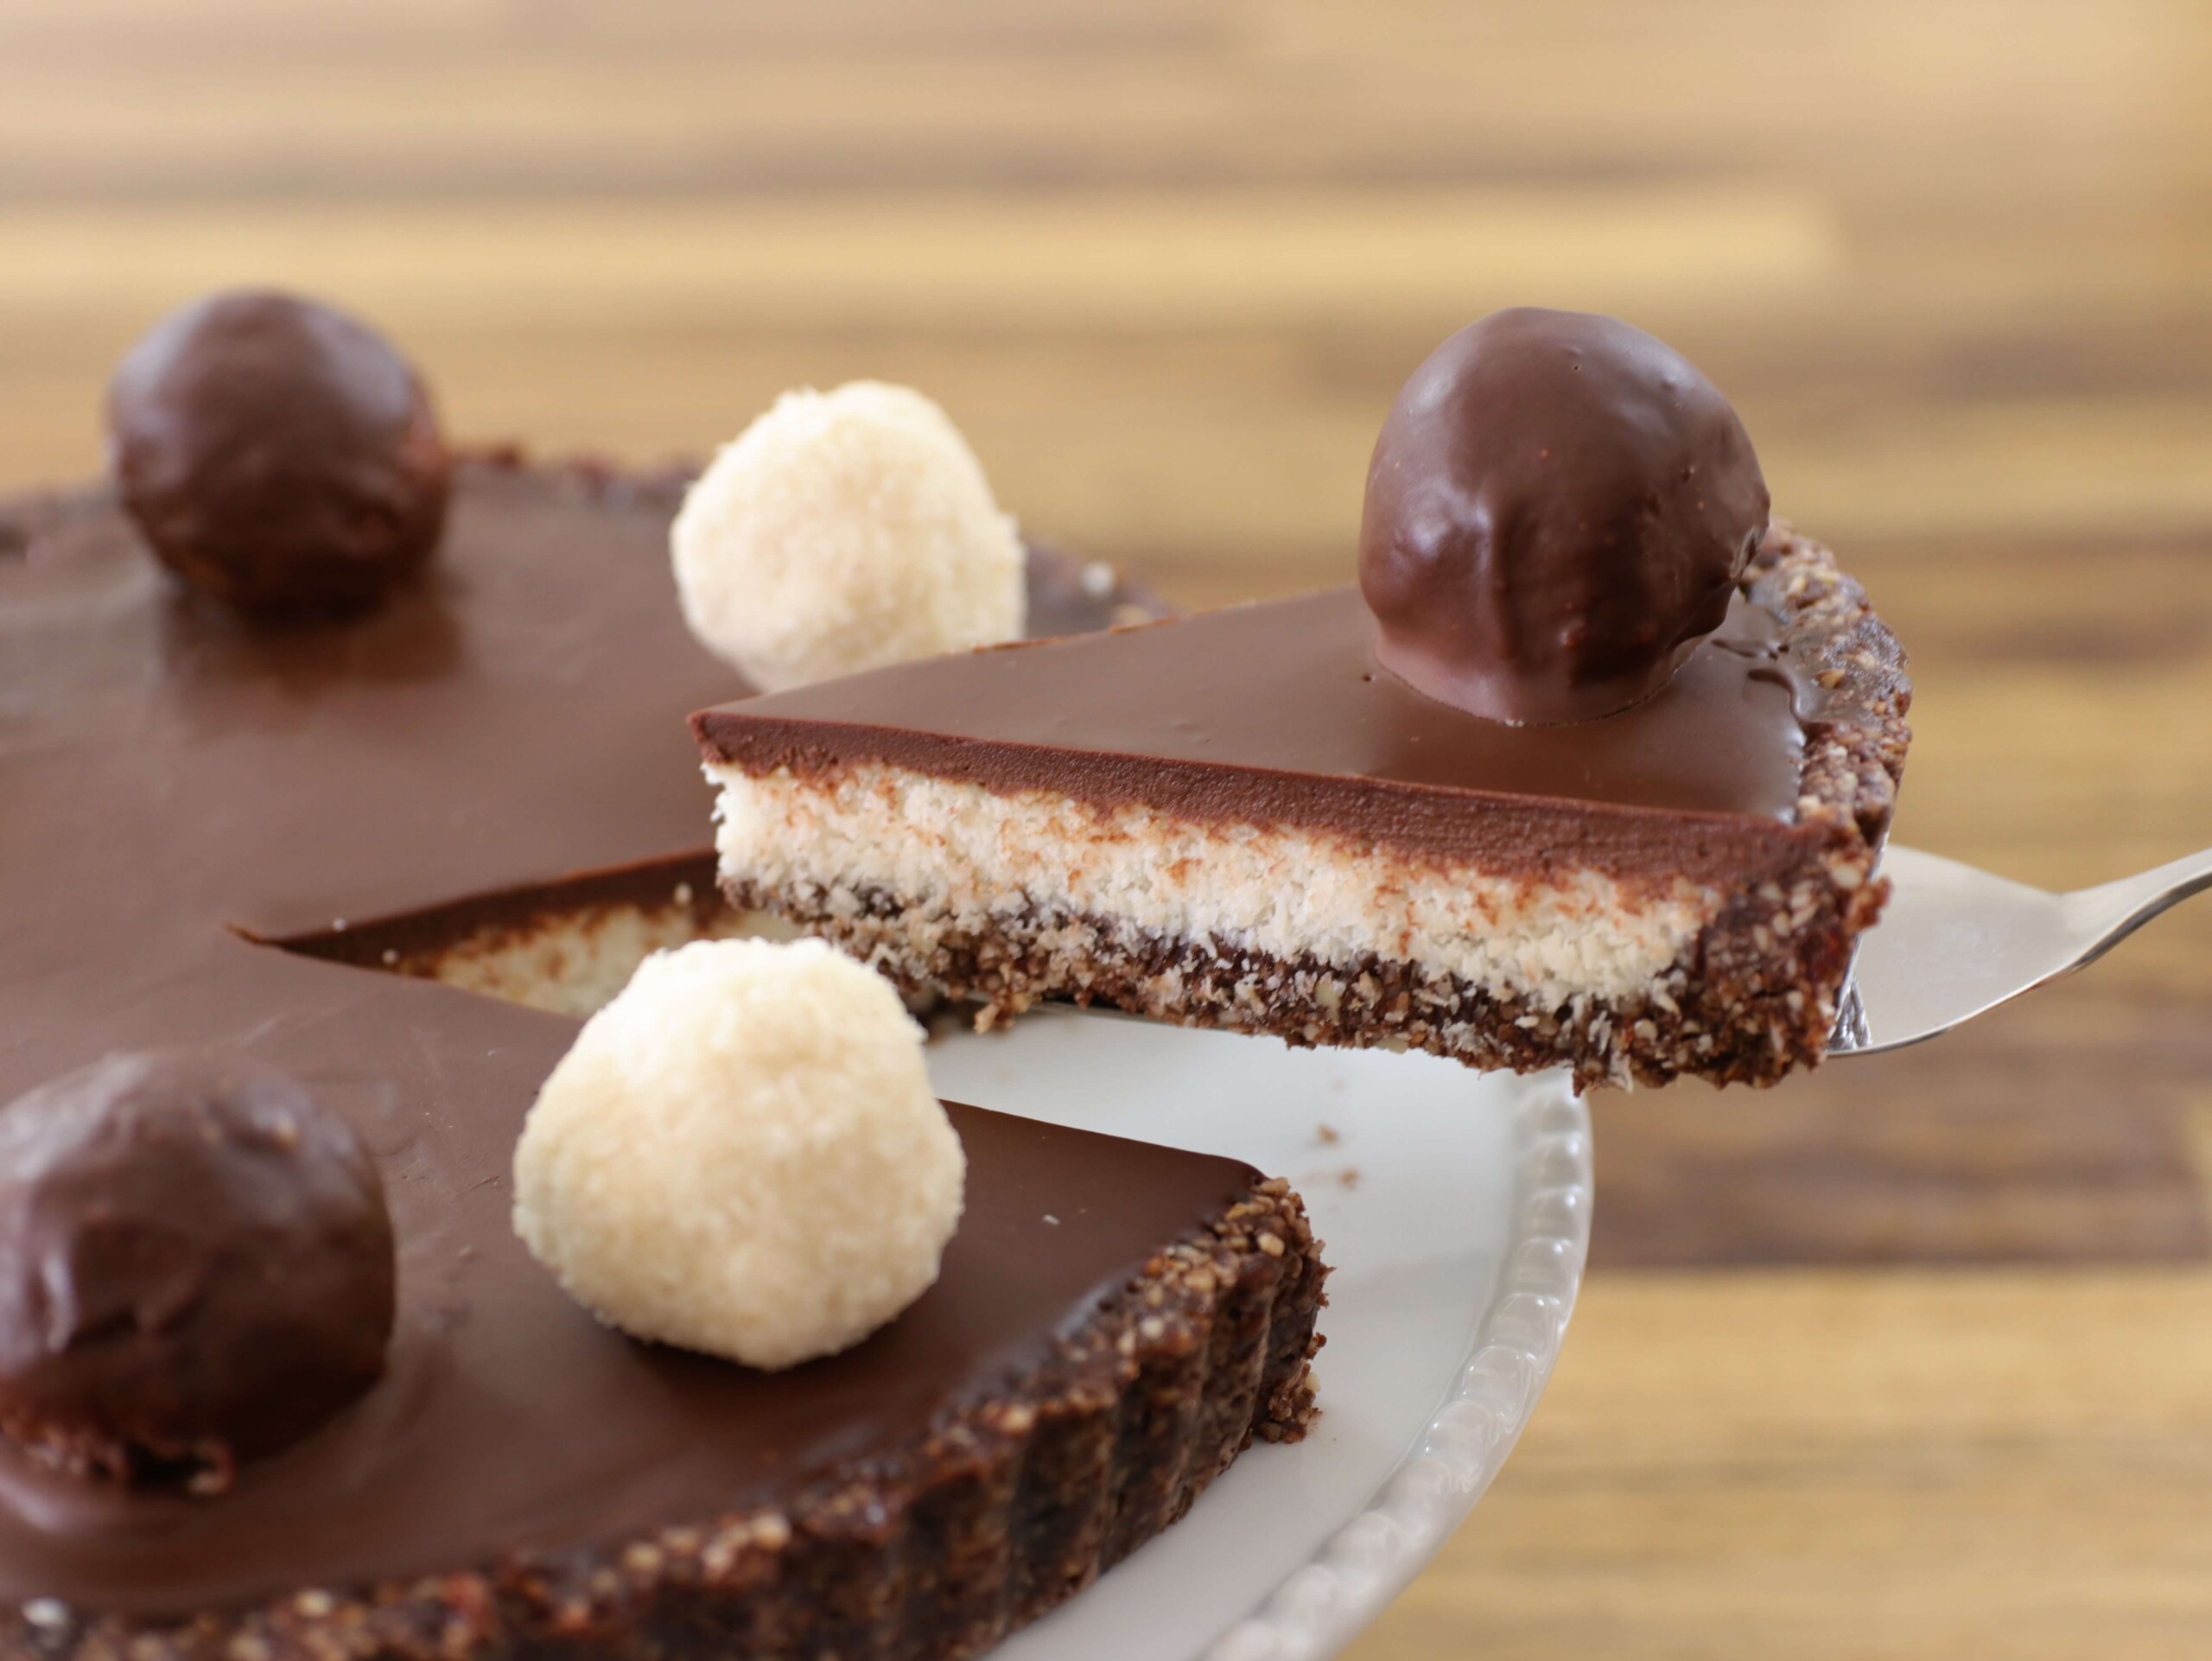
If you like the famous bounty candy bar you will definitely love this no-bake vegan bounty. This chocolate coconut tart is made of 3 layers: the crust of this tart made from nuts and dated, the filling is full of coconut, and topped with vegan chocolate ganache. Beautiful, original and delicious dessert that you will love even if you are not vegan.
No-Bake Vegan Bounty Tart Recipe
Ingredients
For the crust:
- 300 g 10.5oz Almonds
- 230 g 8oz Medjool dates, pitted
- 3 tablespoons Coconut oil
- 2 tablespoons Cocoa powder
- 2 tablespoons Maple syrup
- Pinch Salt
For the filling:
- 1¼ cups 300ml Coconut cream
- 125 g 1/3 cup + 1 tbsp Maple syrup
- 3 tablespoons Coconut oil
- 300 g 10.5oz Desiccated coconut
- 2 teaspoons vanilla extract
For the topping:
- 225 g 8oz Dark chocolate
- 1 cup 240ml Coconut cream
Instructions
- DIRECTIONS1. Make the crust: place almonds in a food processor and process until mealy. Add pitted dates, cocoa powder, coconut oil, maple syrup and process until combined and sticky. 2. Press the mixture into the bottom and sides of an 9-inch (23cm) tart pan. Refrigerate while making the filling. 3. In a small saucepan heat coconut cream, coconut oil, and maple syrup. Bring to a light simmer. Turn the heat off, whisk vanilla extract. 4. Pour the hot mixture over the desiccated coconut. Stir until combined. Transfer the filling into the prepared crust and spread evenly. Do not over fill, leave some space for the topping. Refrigerate while making the topping. 5. Make the topping: chop the chocolate, place in a large heatproof bowl. In a small saucepan, heat coconut cream. Pour hot coconut cream over the chocolate, let sit 1-2 minutes, then stir until smooth. 6. Pour the ganache over the tart. Spread evenly. Refrigerate for 10-15 minutes. 7. From the remaining coconut mixture shape 8 small balls. dip half of the balls in the remaining ganache. Decorate the tart. 8. Refrigerate for at least 2 hours before serving. Notes:
- For the crust, instead of almonds you can use hazelnuts or cashews, or combination of them.
- For the decoration, you can dip all 8 balls in ganache or leave them without the ganache.


")


Hi, this looks like a great tart. I want to make it for my birthday next week, but I’m not sure what is meant with coconut ‘cream’. Is it the same as canned coconut milk or a block of ‘creamed coconut’, or something different?
Hi,
It’s canned coconut cream with about 20% fat. But you can also use canned coconut milk.
Great, thanks!
Pretty good recipe overall, but there are some things that need to be modified:
– I couldn’t shape balls with the coconut filling, as the balls disintegrated when I tried to create them. The filling didn’t seem sticky enough.
– the topping was too liquidy. I had to add two chocolate squares to obtain the right consistency, creamy and smooth.
The taste was good nevertheless, and I recommend this recipe!
Pretty good recipe overall (wanted to rate it 4 STARS, but I made a mistake…). The taste was good, but there is a few things to modify, according to me:
– I couldn’t create balls with the coconut filling, as it directly disintegrated when I tried to shape the balls;
– the topping was too liquidy. I had to add two chocolate squares for it to be creamier.
But I still recommend this recipe!
Can I freeze few slices for later?
Yes, you can.
I did the tart yesterday. It has a number of flaws so I won’t redo it ago.
Base:
The ratio dates / nuts is not correct. The base is heavy and filling. It would be great for energy balls but if you eat a piece of the tart it’s so mouthful and filling that you lose the fluffiness of the coco
The filling
The ratio maple s / coco is not correct. It’s by far too sweet. You need to probably reduce of by half and increase the coco cream or milk to make it moisty
Topping
The biggest issue here. T
This looks delicious, Is the coconut cream unsweetened, also, the desiccated coconut can I buy unsweetened and food process it? Thank you 😊☀️💛
Hi,
The coconut cream is unsweetened.
Yes, you can.
Can you use almond meal?
Thank you for the recipe, I just made it for my boyfriends birthday and he said it’s the best cake he ever had 😀